If you’re looking to permanently delete your Evernote account, whether because you’ve switched to another note-taking app or simply want to ensure your data is forever removed, you’ve come to the right place. In this detailed guide, we’ll walk you through the steps to permanently delete your Evernote account, as well as options for temporarily deactivating your account if you’re not ready to say goodbye forever. We’ll cover how to delete your account across different devices, including iPhone, Android, and PC.

Why Delete Your Evernote Account?
Before you proceed, it’s important to understand why you might want to delete your Evernote account:
- Privacy Concerns: Ensuring that your personal data and notes are permanently erased.
- Switching Services: Moving to another note-taking service that better suits your needs.
- Simplifying Digital Life: Reducing the number of online accounts you maintain.
Important Considerations Before Deleting
Before you permanently delete your Evernote account, here are a few things you should do:
- Backup Your Data: Make sure to download or export any important notes or files. Once your account is deleted, this data will be inaccessible.
- Cancel Subscriptions: If you have a paid Evernote subscription, cancel it first to avoid any future charges.
- Consider Deactivation: If you’re not entirely sure about deleting your account, you might want to deactivate it instead. Deactivation allows you to reactivate your account in the future.

Step-by-Step Guide to Deleting Your Evernote Account
On a PC
- Sign in to Evernote: Visit the Evernote website and sign in with your account credentials.
- Access Account Settings: Click on your profile icon and navigate to ‘Account Settings’.
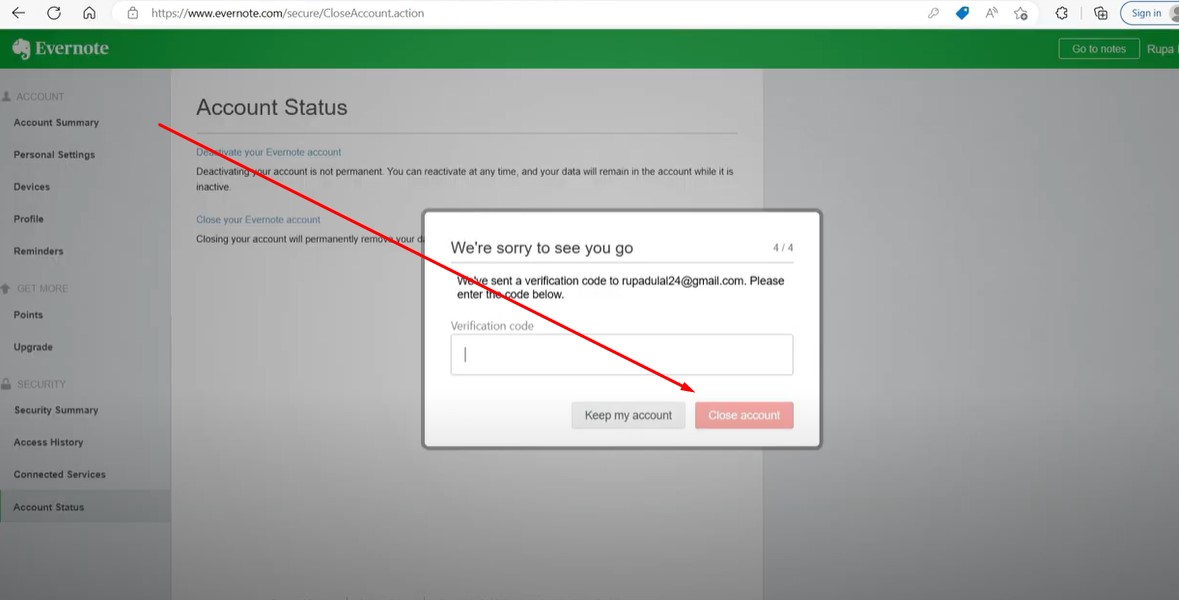
- Close Your Account: Under ‘Account Status’, you’ll find the option to close your account. Click it and follow the on-screen instructions.
- Confirm Deletion: You will need to enter your password to confirm that you want to permanently delete your account.
On an iPhone
- Open Evernote App: Log into your account on the Evernote app.
- Go to Settings: Tap on your profile icon and go to ‘Settings’.
- Navigate to Account Info: Scroll down to find the ‘Account Info’ section.
- Request Account Closure: Tap on the option to close your account and confirm your decision.
On Android
- Launch Evernote App: Open the app and log into your account.
- Access Settings: Tap on the menu icon and go to ‘Settings’.
- Select Account Information: Find and select ‘Account Information’.
- Close Account: Follow the prompts to close your account permanently.
What Happens After Deletion?
Once your Evernote account is deleted:
- Data Removal: All your notes and data will be permanently deleted and cannot be recovered.
- Subscription: If you did not cancel your subscription before deletion, you may still be charged.
- Account Reactivation: You cannot reactivate or recover your account once it’s deleted.

Frequently Asked Questions
Can I reactivate my Evernote account after deleting it?
No, once you’ve permanently deleted your account, it cannot be reactivated. Make sure you are certain before proceeding with the deletion.
Do I need to delete all my notes before closing my Evernote account?
While not necessary, it’s advisable to manually delete notes and empty the trash before closing your account to ensure all your data is permanently removed.
What happens to my paid subscription when I delete my Evernote account?
It’s important to cancel your subscription before deleting your account to avoid any further charges. Deleting the account does not automatically cancel your subscription.
Terms of Service and Support
Reviewing Evernote’s Terms of Service is crucial before deleting your account. If you encounter any issues during the deletion process, Evernote’s support team is available to help.
By following the steps outlined above, you can effectively manage your Evernote account deletion, ensuring your data is handled according to your preferences.
